Open Command Prompt as Admin, run (to delete anything that starts with filename):
for /f "delims=" %i in ('dir /s /b /ad filename*') do rd /s/q "%i"
Open Command Prompt as Admin, run (to delete anything that starts with filename):
for /f "delims=" %i in ('dir /s /b /ad filename*') do rd /s/q "%i"
vssadmin list shadows command into the elevated command prompt, and press Enter. This will list all shadow copies (restore points) on all drives. You will see the volume drive letter and shadow copy ID number for each one. You will need this information for the steps below.

vssadmin delete shadows /allvssadmin delete shadows /all /quiet
vssadmin delete shadows /For=(drive letter): /allvssadmin delete shadows /For=(drive letter): /all /quietSubstitute (drive letter) in the commands above with the drive letter you want. This will be listed as Original Volume: (x: ) from step 2 above.
For example:
vssadmin delete shadows /For=C: /all
OR
vssadmin delete shadows /For=C: /all /quiet


vssadmin delete shadows /For=(drive letter): /oldestvssadmin delete shadows /For=(drive letter): /oldest /quietSubstitute (drive letter) in the commands above with the drive letter you want. This will be listed as Original Volume: (x: ) from step 2 above.
For example:
vssadmin delete shadows /For=C: /oldest
OR
vssadmin delete shadows /For=C: /oldest /quiet

vssadmin delete shadows /Shadow={Shadow Copy ID}Substitute Shadow Copy ID in the commands above with the actual Shadow Copy ID number of the restore point you want to delete from step 2 above.
For example: vssadmin delete shadows /Shadow={3e351030-9ebd-428c-9ff3-86dca40a7f96}

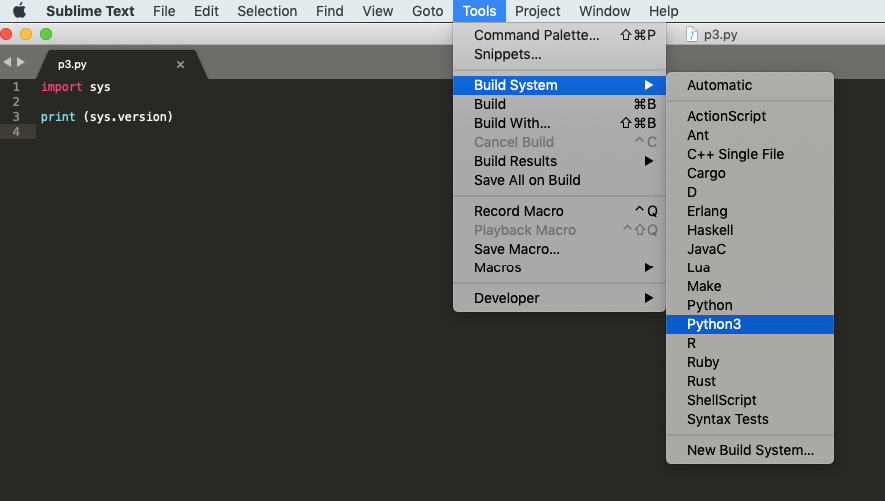
{
    "shell_cmd": "/usr/bin/env python3 ${file}",
    "selector": "source.python",
    "file_regex": "^(...*?):([0-9]*):?([0-9]*)",
    "working_dir": "${file_path}"
}
import sys
print (sys.version)
3.6.3 (v3.6.3:2c5fed86e0, Oct  3 2017, 00:32:08)
[GCC 4.2.1 (Apple Inc. build 5666) (dot 3)]
[Finished in 0.4s]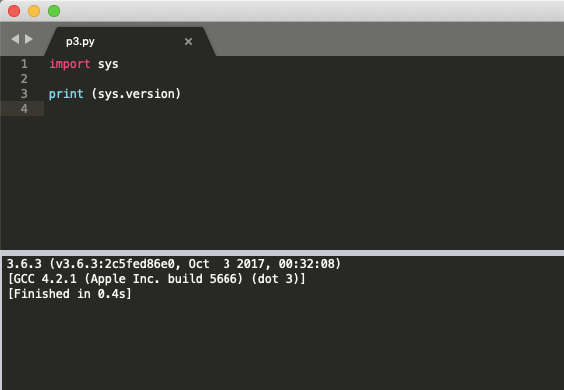
~/Library/Preferences/ByHost/com.apple.loginwindow.*plutil -convert xml1 ~/Library/Preferences/ByHost/com.apple.loginwindow.*plutil -convert binary1 ~/Library/Preferences/ByHost/com.apple.loginwindow.*chflags uchg com.apple.loginwindow.*.plist